POS Lavu printer error
 Set-Up: Epson Printers
POS Lavu now supports Epson Ethernet printers. The following printers are supported TM-T20, TM-T20II, TM-T70II, TM-T88V, TM-T88Vi, and TM-U220.
All printers used with POS Lavu should be Ethernet printers hardwired directly to the router or a switch.
It must be understood that in some cases printers that were previously used with other Revel pos documentation, manualss may not be programmable to work WITH other Revel pos documentation, manualss, including Lavu POS.
Once acceptable Epson Printers are purchased, follow the steps below.
Please refer to the following documents to assign Kitchen printers to Menu Categories and Menu Items:
Please refer to the following document to Select Registers for receipt printers:
THE PRINTER:
1. Plug one end of an Ethernet cable into the router and the other into the back of the Epson printer.
 2. Plug the printer power cable into the back of the printer then plug into a wall socket.
3. Turn the printer on; after powering on, the printer will print out a small slip of paper with an IP Address. Save this slip of paper, it is necessary to properly set-up the printer.
NETWORK AND CONTROL PANEL SETTINGS:
1. Open a web browser (preferably Google Chrome, Mozilla Firefox, or Safari).
2. Type the IP Address from the printed ticket into the URL field.
3. Click TCP/IP located on the left side of the Epson configuration page.
4. Select Manual from the “Get IP Address” drop down menu.
5. Enter an IP Address (this will be the static IP Address for the printer, not necessarily what was printed on the ticket, it should be outside of the router’s DHCP range).
6. Click Submit located at the bottom of the configuration table.
 7. Click Reset to enable changes.
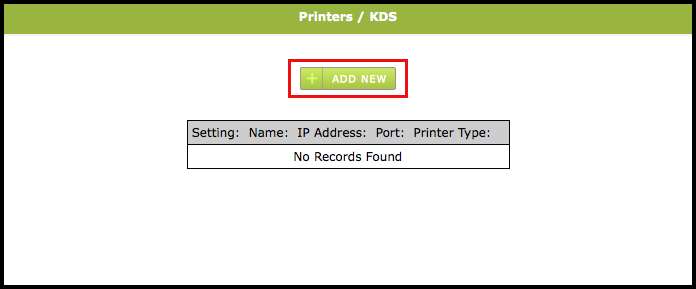
8. Log into the Control Panel at admin.lavu.com.
9. Navigate to Settings > Printers/KDS.
10. Click Add New.
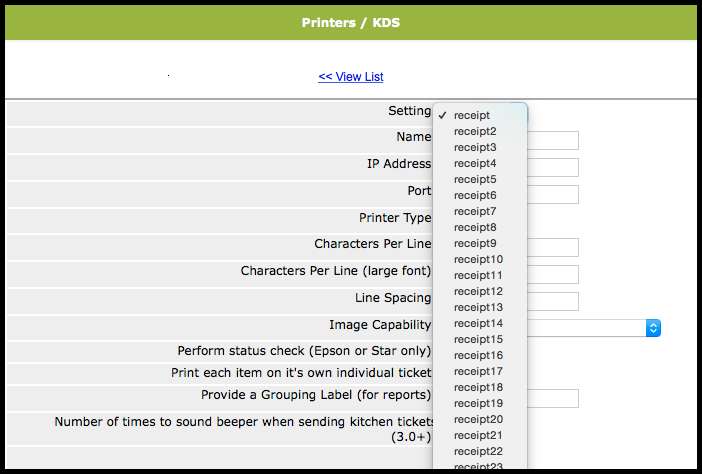
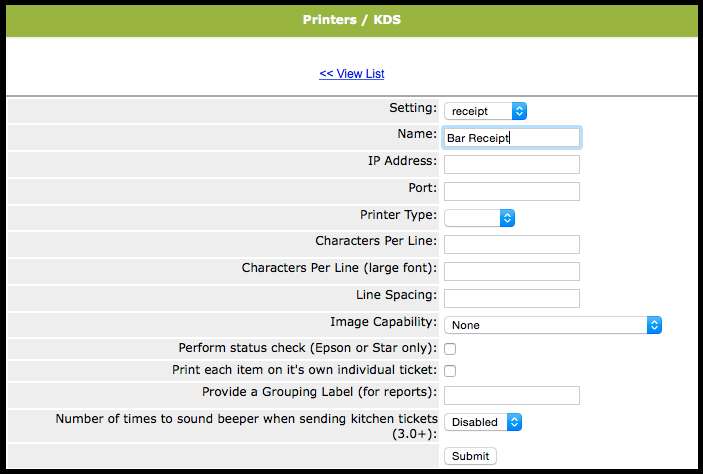
11. Select the appropriate unassigned Setting (Receipt or Kitchen).
12.Enter the Name of the printer (it is recommended that printer names adequately describe what the printer is used for; i.e. Bar Printer or Salad Station).
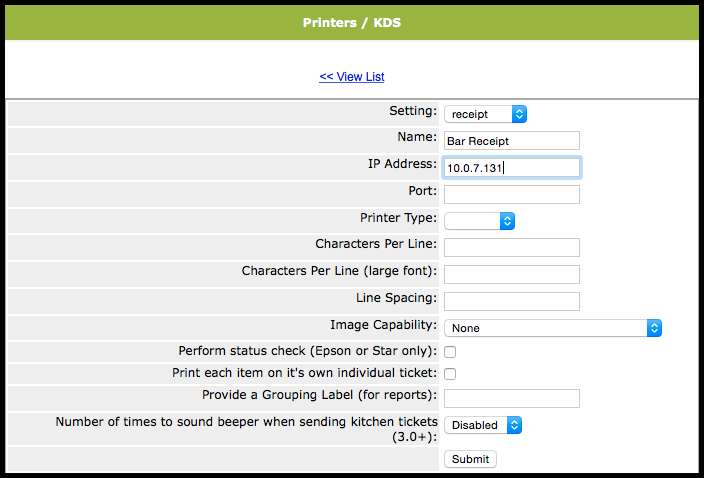
13. Enter the IP Address that was entered into the Epson configuration page.
14. Enter the Port (most commonly 9100).
15. Select Epson from the “Printer Type” drop down menu.
16. Select the appropriate “Command Set” from the drop-down menu.
17. Select the appropriate “Model” from the drop-down menu.
18. For Image Capabilities, select Epson Graphics (2.3.5+) from the drop down menu.